11294 Views |
Experimental. Tricky. Unique. Green Duochrome film is our most challenging film to date. But when you get it right, you get it really right: at its best, it adds a beautiful dimension to architectural, abstract, and portrait photography. To help you reach that best, we’ve enlisted the help of some singularly brilliant artists to drop some game-changing Green Duochrome tips.
We use our regular black and white film as a basis. A mix of different dyes is used as colorant to create the special Duochrome paste. The colors used to get this green edition were a combination of Yellow and Cyan dye.
Even though this sounds pretty straightforward, there are always challenges with these formulations. The Duochrome formulations are still somewhat experimental. There is a tendency for the colorants to interact with the normal paste. In the final image there can be a formation of a lot of tiny spots which we refer to as mottle. To reduce that effect we need to add surfactants, but the use of that also has some side effects. It’s as fun as it is experimental as it is challenging!
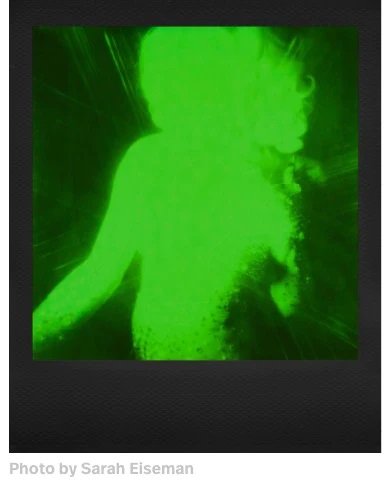
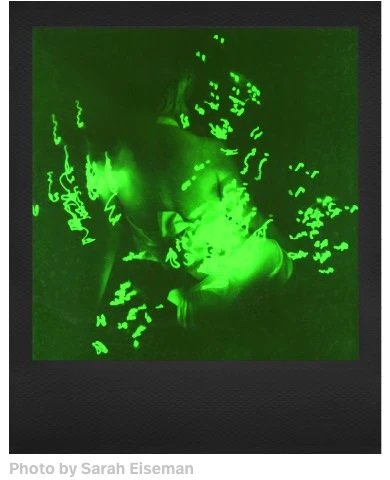
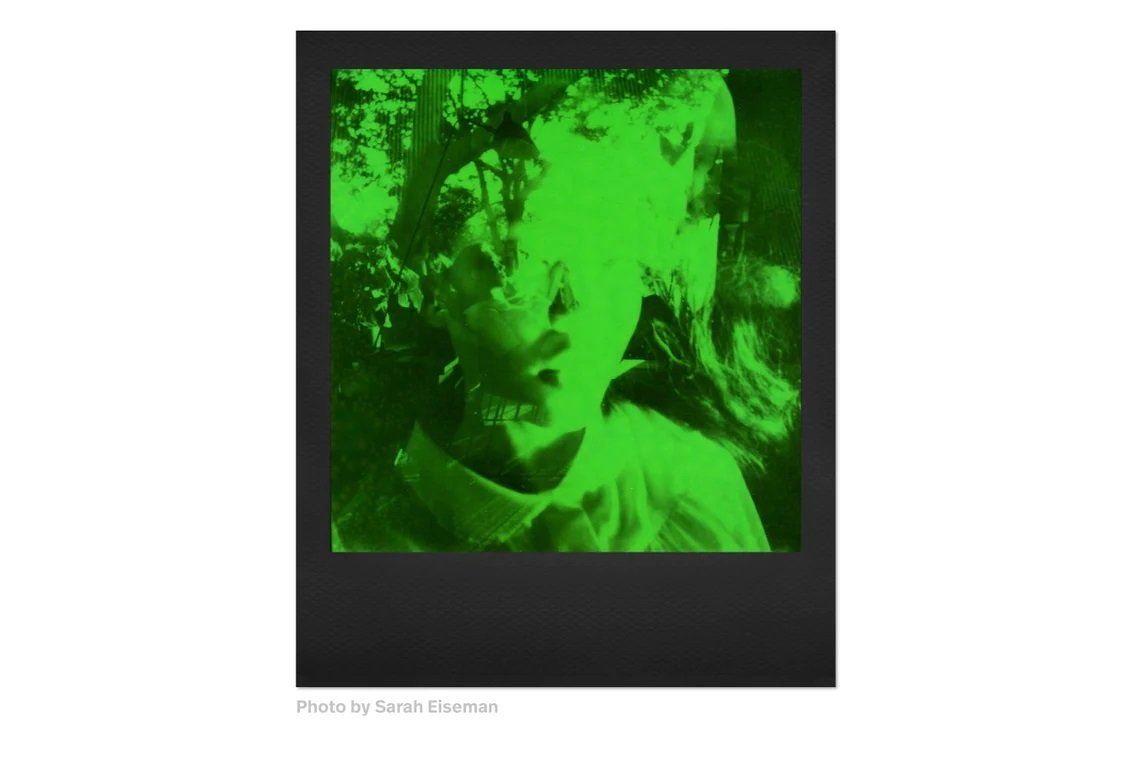
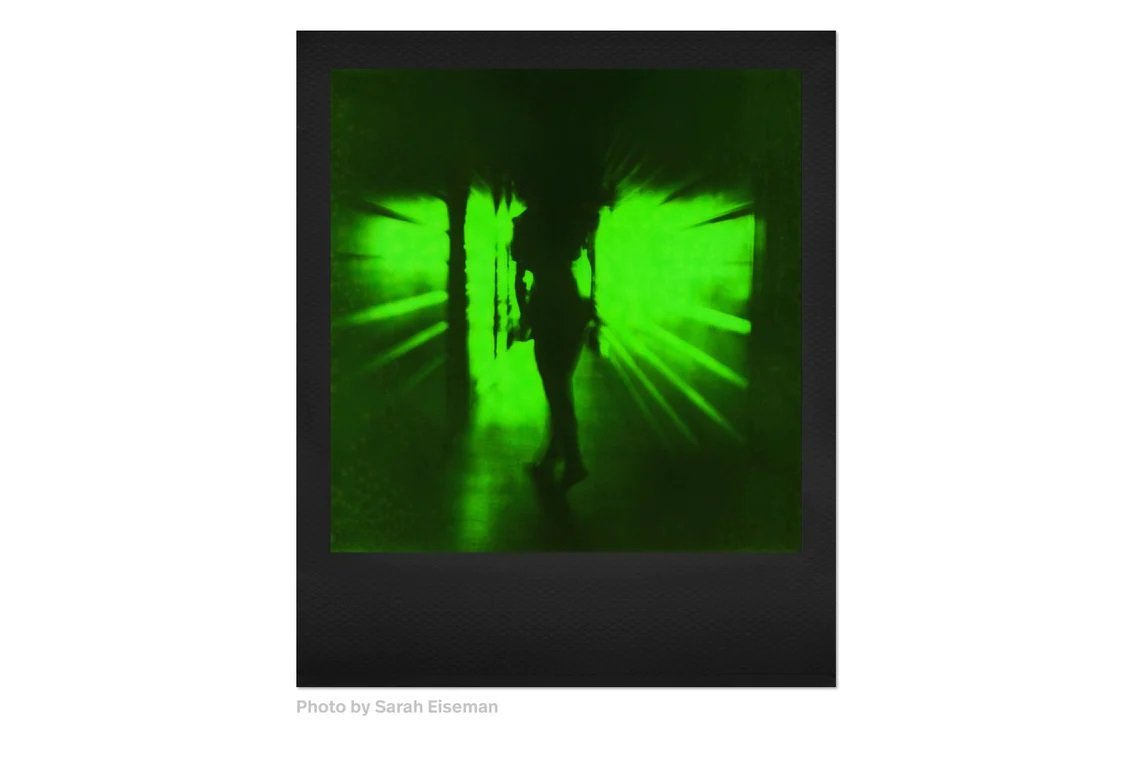
LA-based photographer/director/writer @saraheiseman has her own unique style of photography that reaches into surreal, colorful abstract realms while retaining a sort of beautiful purity. She shares her tips on Green Duochrome abstract photography (and has used the Polaroid Now+ in her exploration and research).
Paint with light
Light painting does actually work well with this film and I was pleased with the results when working with the Polaroid App! I used a small light and exposed it at various points on a model for 15-20 seconds.
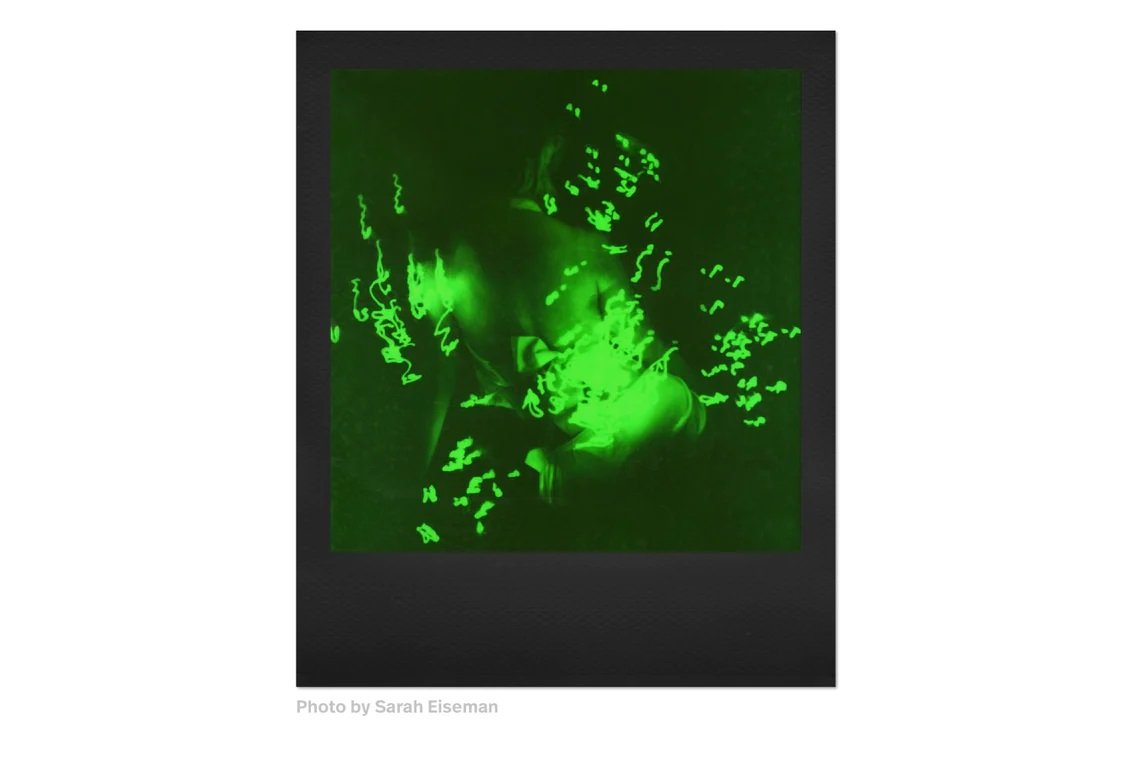
Double Exposure. No flash.
Double exposures are kind of tricky on this film and for me it worked best with no flash, and with both images having many points of contrast, ranging from dark & underexposed to normal lighting scenarios.
Control, control, control.
This film did not do well for me personally in bright, hot, outdoor light and environment. Even regular images without flash & with auto-exposure come out with the sunspot mottling, and are often overexposed in their final development phase. Again, the best results were done at night or in-studio with more controlled lighting and temperatures.
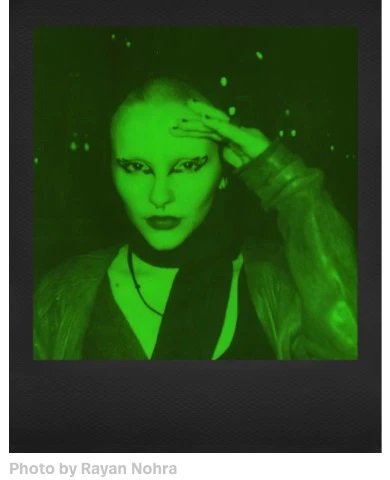
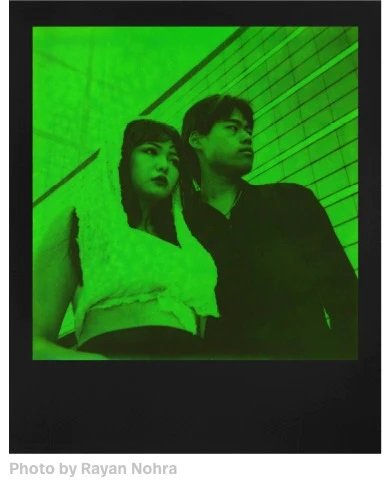
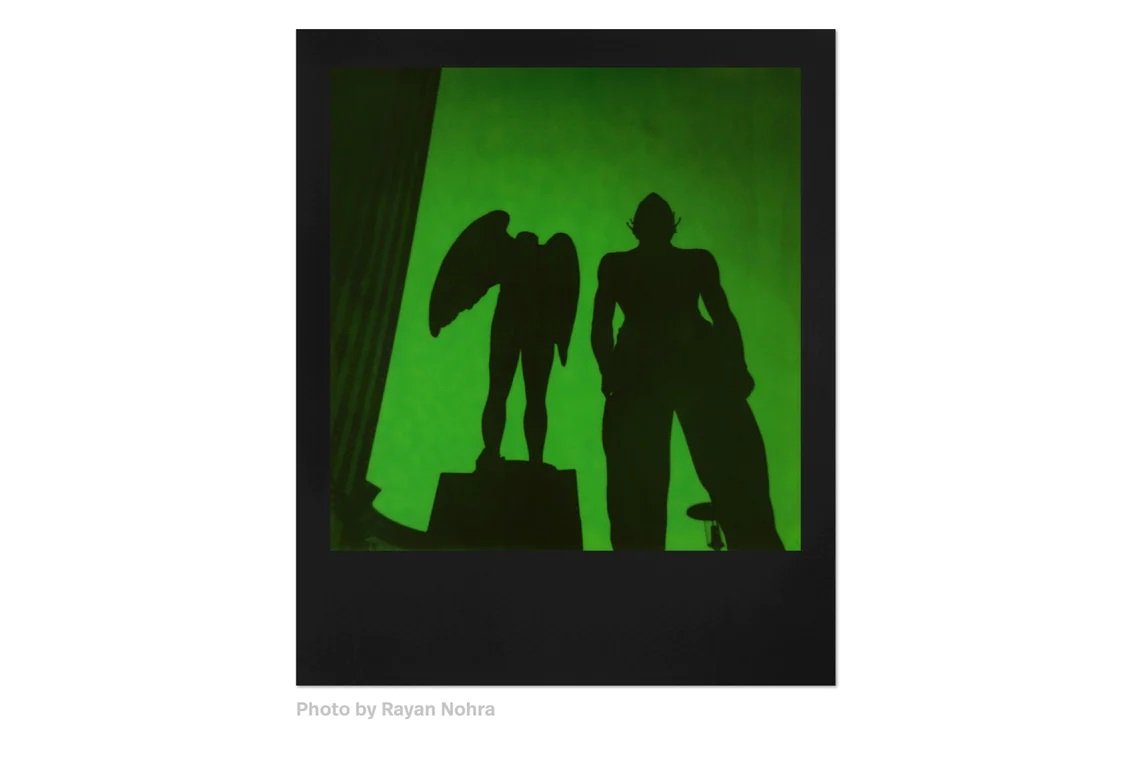
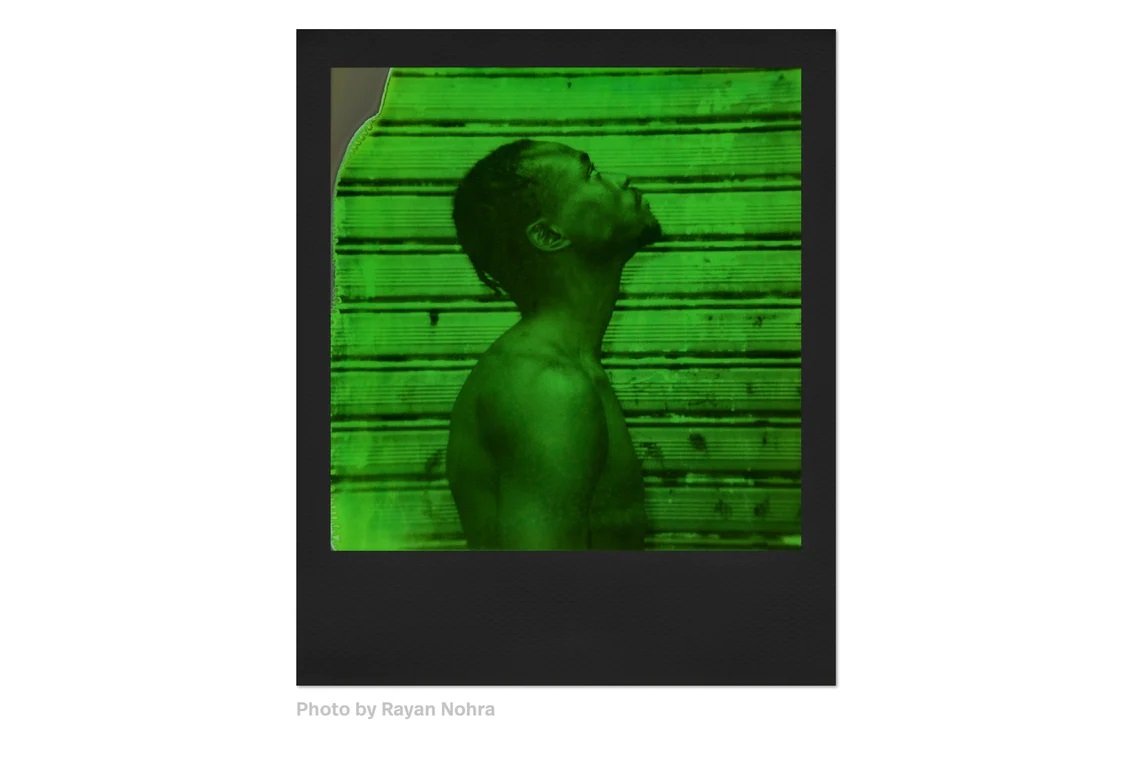
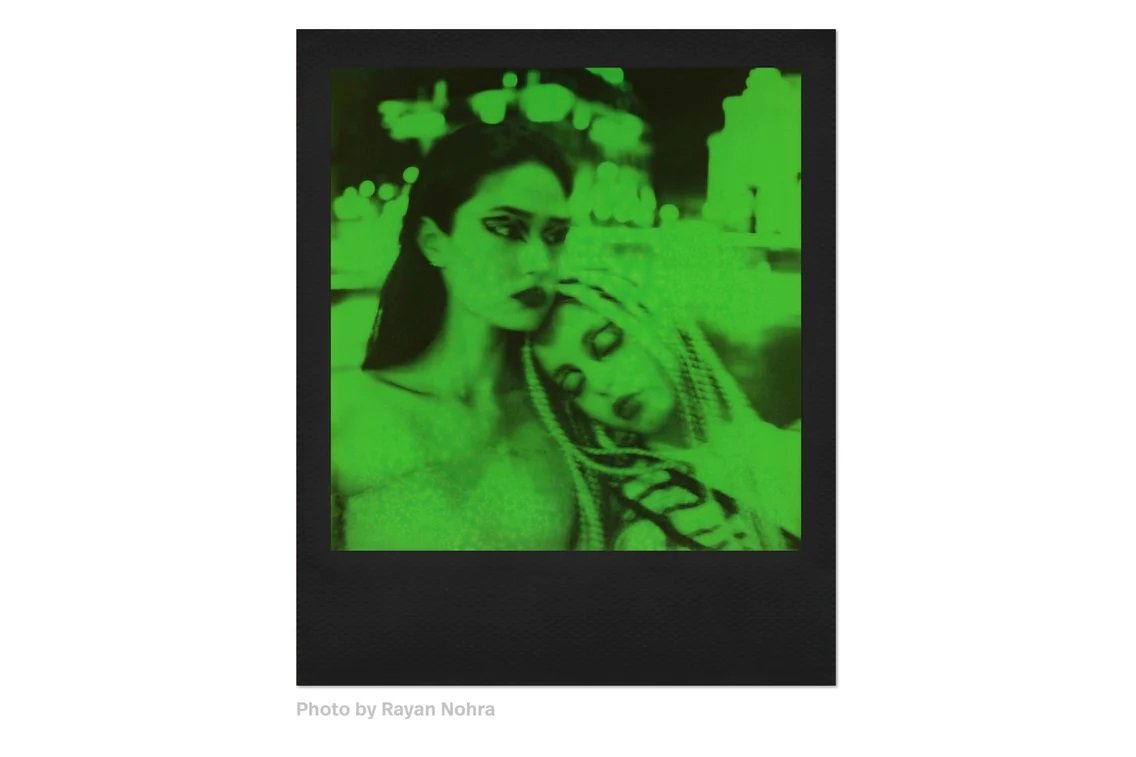
Paris-born, Moroccan & Lebanese portrait photographer, @rayannohra loves to play with textures, colors, compositions, and printing processes to create truly individual portraits. He shares his tips on how to achieve great portraits with Green Duochrome film.
Contrast is beautiful
The more shadow there is the better. The picture will look more striking the more there is a difference between the light and shadow.
Strong light vs Weak light
I found that no matter the shooting conditions, the color is very consistent, but perhaps avoid very strong lights if details are what you’re looking for… Otherwise go for it if you’re looking for very strong/sharp lines and shadows.
Close subject, strong backgrounds.
I found that results were more interesting with the subject quite close (maybe a bit over arm’s length), against solid, strong backgrounds that don’t detract from the foreground.
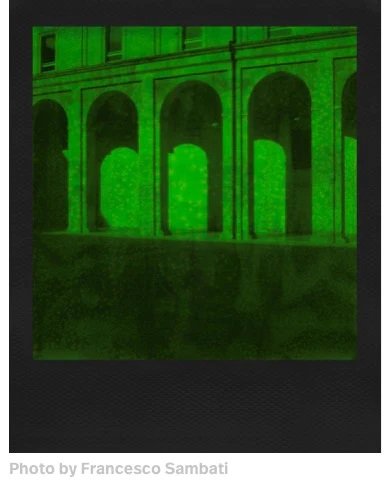
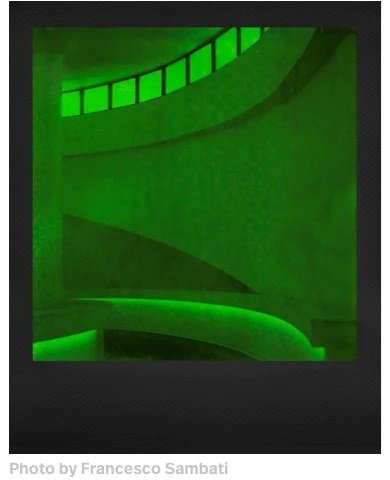
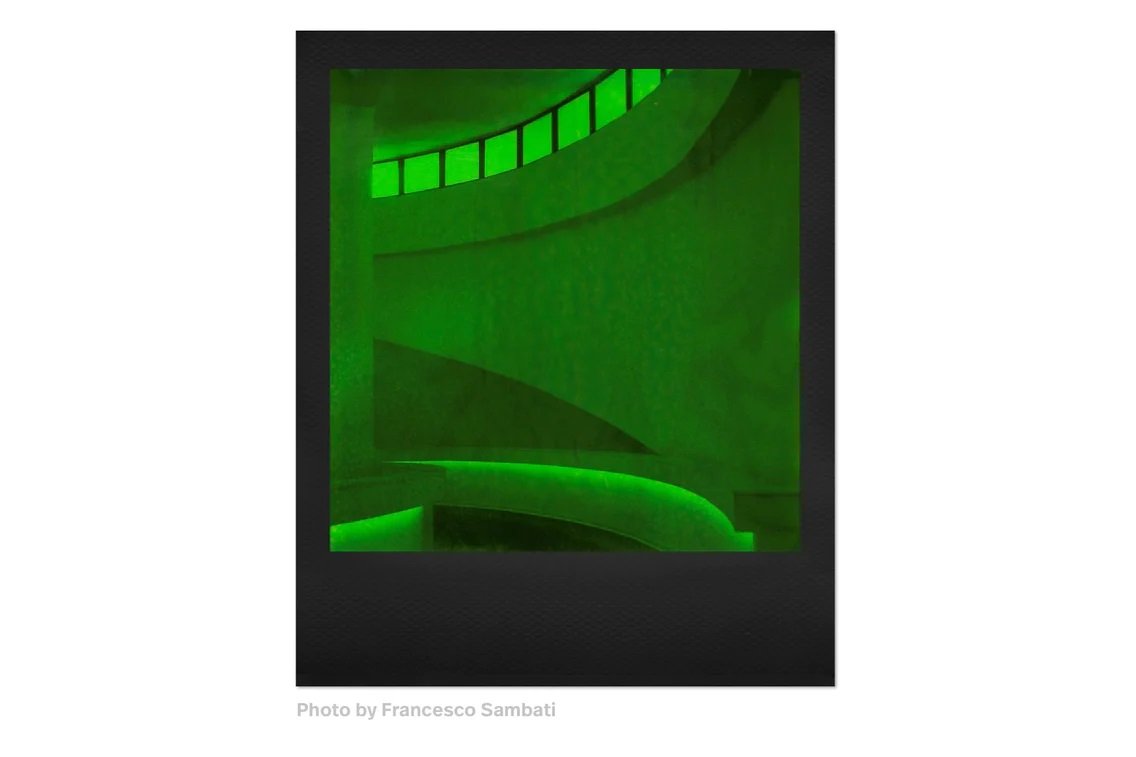
Italian photographer and artist, @francesco.sambati, predominantly combines digital production with his Polaroid photography. His work deal in particular with the themes of the exploration of the landscape, absence and the unconscious, trying to make them converge together in a common meeting point. He enlightens us on how to get the best out of Green Duochrome architectural photography.
Sharp & angular. Low & open.
In my opinion, the ideal buildings for this photography are the sharpest and most angular ones. They create more multifaceted shadows.Alternatively, low buildings placed in open spaces are also powerful, as they cast very large shadows on the ground, which are captured well with this film.
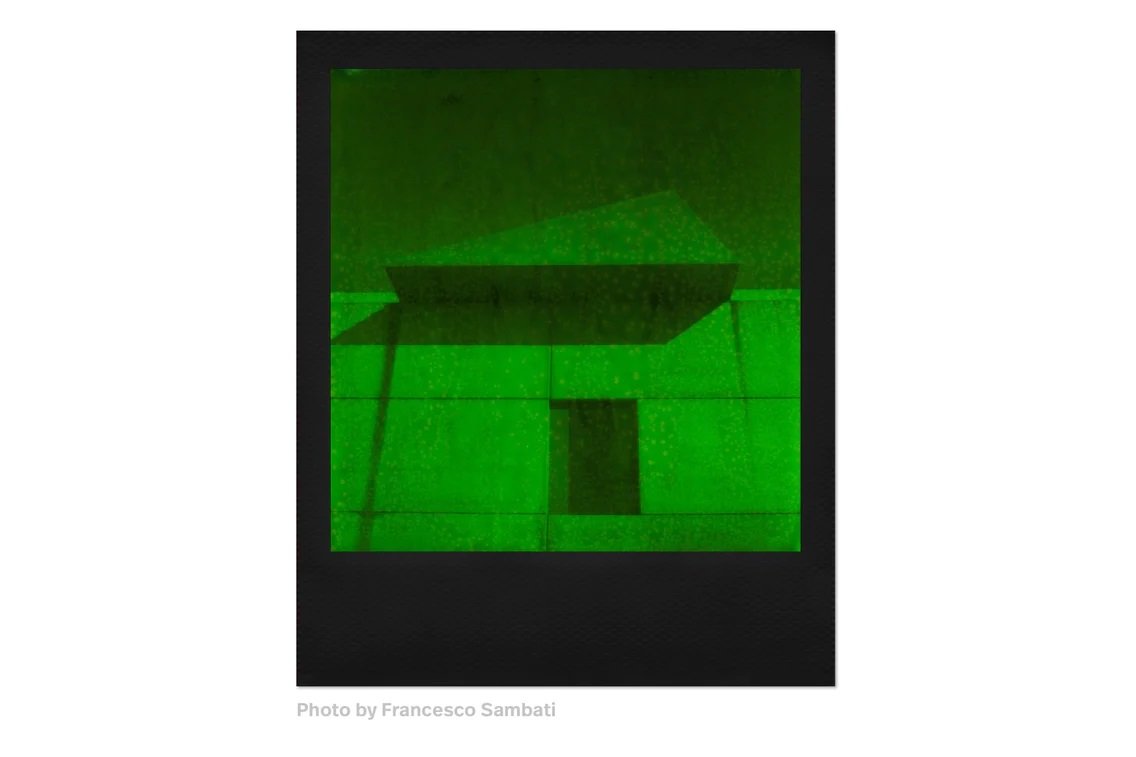
Shadows are your friends
The shadows must be very contrasted. I recommend underexposing the photo to have darker shadows that enhance the lines of the architecture, though be careful, as you don’t want to lose too much detail in the highlights. (You’ll have to dial back the exposure manually on your Polaroid camera.)
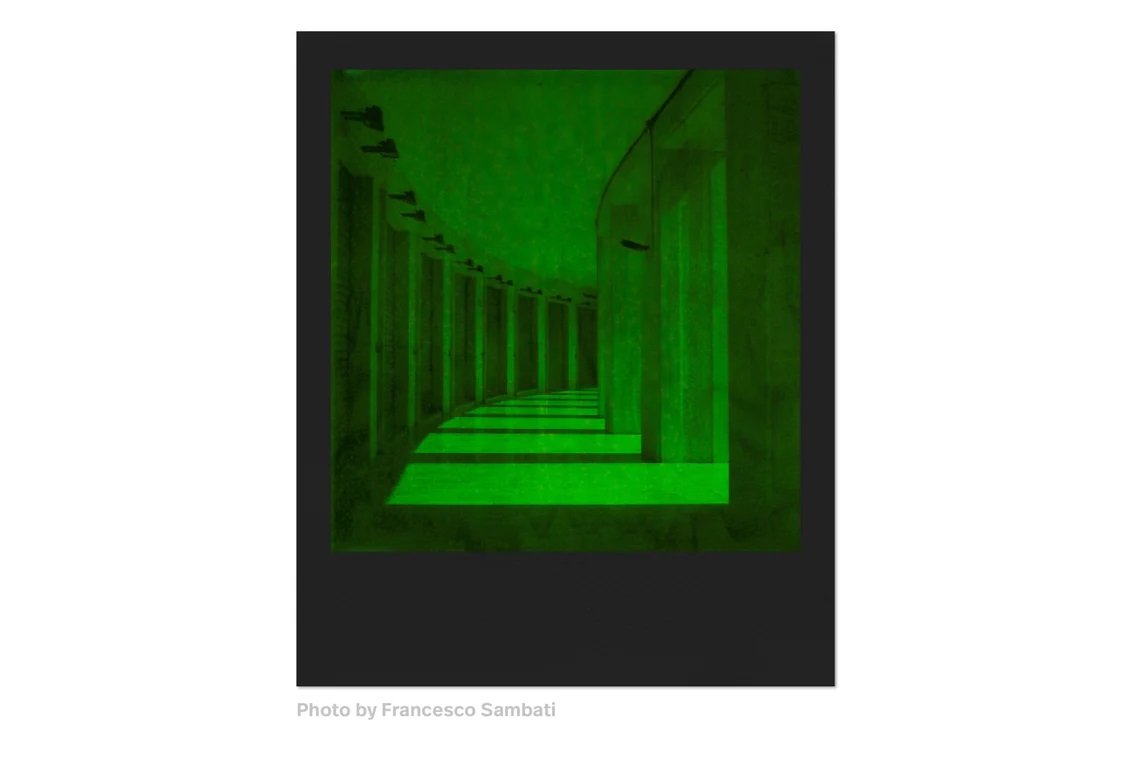
Choose your time of day
This film develops faster and is sensitive to light. To get a brighter green, shoot with early morning light. However, I prefer that denser green, so I shot in the early afternoon (and again, underexposed in both cases).
Feeling inspired and ready? One more heads-up from us: even with the useful tips above, the film's extreme experimental nature means that we cannot guarantee stable results. As such, we sell it at a reduced price. We do not accept refunds related to defects or faults of any kind.
Up for the challenge? Grab the Green Duochrome 600 film now! And for more artistic inspiration, make sure to follow @francesco.sambati, @rayannohra, and @saraheiseman. Good luck!


